

extraordinary!!


lately i have been going room to room making list of things to change or update. when i see that major power tools or expertise are needed i make a list for Tony. when i see a job that i can very well perform i make a list for me.
in here it was all me.
i have been going for those little homemade touches lately and have loved them. {i'm toying with an idea for a handmade tree for christmas - a second house tree - but that's a topic for another time...}
so in here my little eye floated upwards and my heart screamed yes!
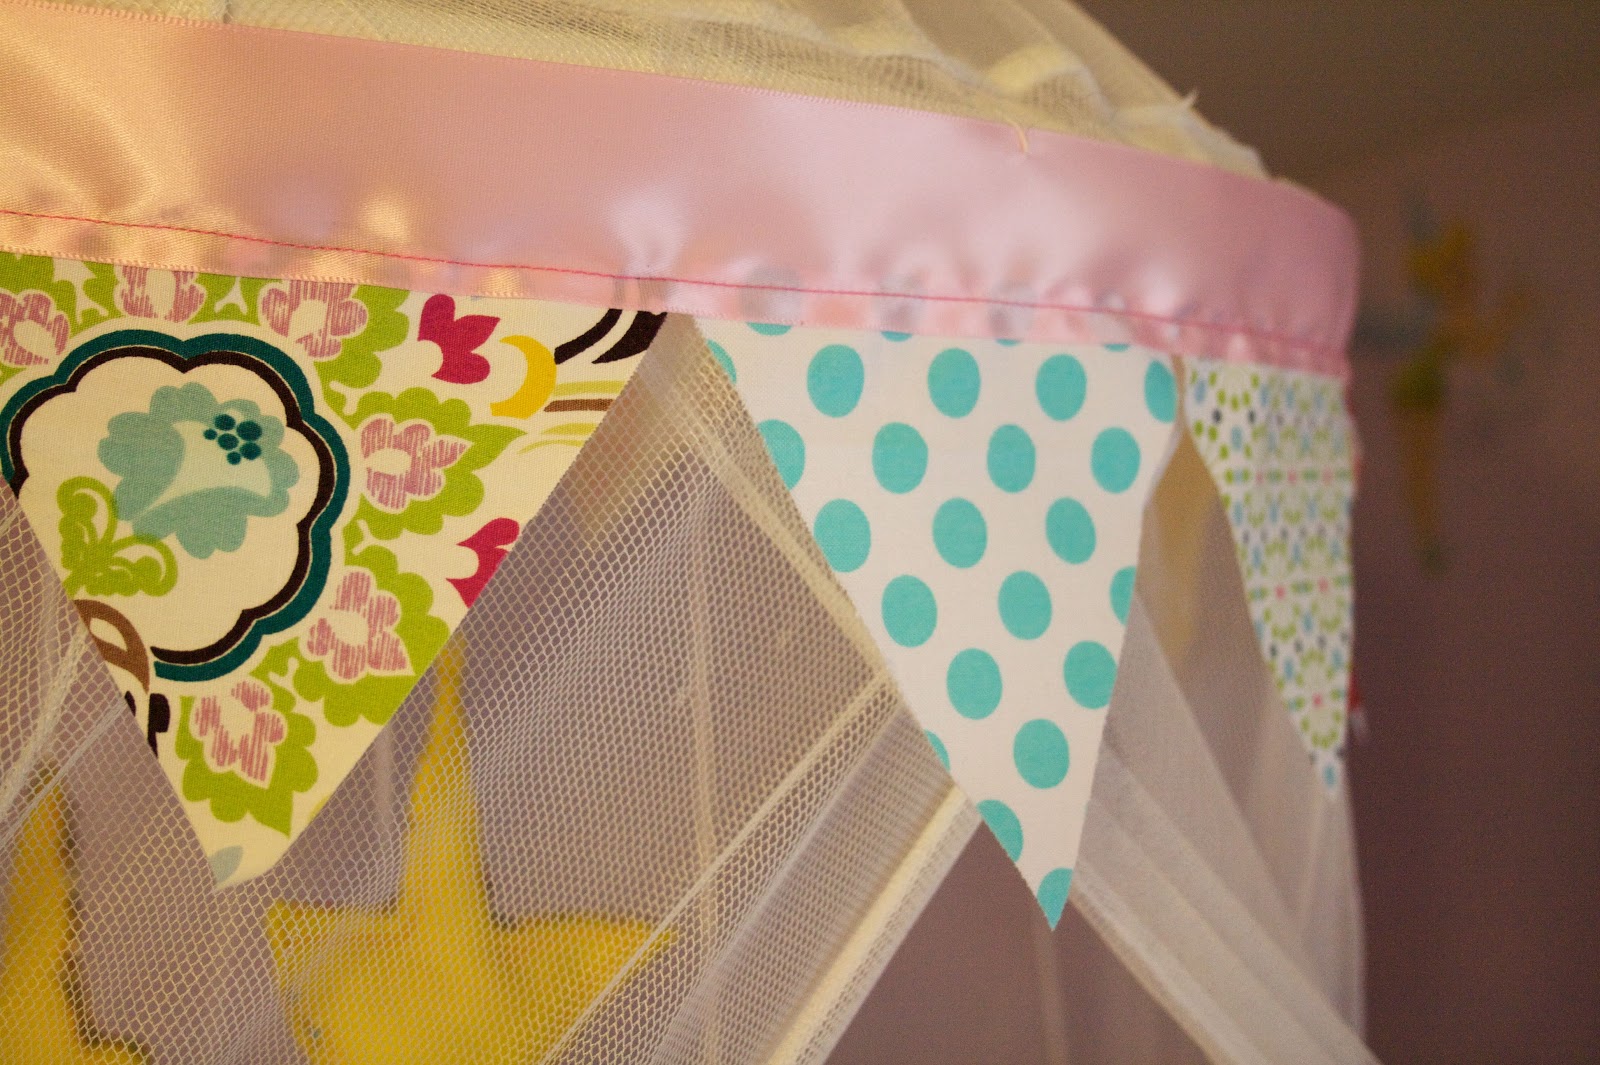
the plain old ikea canopy was screaming for some frosting.
a little whimsy.

immediately i had a plan.
a little girls room + amazing fabric = perfect whimsy.
i was on the right track.

this summer i became obsessed with bunting. multi- patterned fabric bunting. i hung some here. and some here. and i even made some for here.
so...why not put some in here?
for my birthday i got a new sewing machine and have definitely given in a workout. isn't that what presents are for? to get what you want and use it all the time? that's what i thought too.
to me this bunting gave it the right touch and makes me smile.
and aydan was pretty excited about it too.
someone once told me that bunting makes you happy.....i tend to agree.
and house......this is just the beginning!
canopy transformation know-how:
okay i have to confess something here....
i am crap at step by step.
i tried to take photo's as i went but the brilliance of some does not translate to me.
so...i am just going to talk to you about it. is that okay? will you not hate me in the morning?
okay, let's do this!
first thing you need is the canopy. head over to ikea, grab one, grab a new sofa as well because we are heading in to the tv room next ;), then come back and we will go on to the next step.
don't worry i will wait................................

back? okay. so IF you are no where near an ikea some mosquito netting and some kind of hoop will work. drape the netting over the hoop, attach it and attach an s hook in the center top and hang.
step 2: measure around the hoop for the length of ribbon you will need and give your self another half of that {divided in two} for extra on either side.
now make a template out of white card stock of different styles of triangles and tape to the underside of your ribbon, hold up and see which style you like best. choose your style and let's get moving.


now pick your fabric, iron them out and cut out your triangles using your template.
once all your triangles are cut, arrange them in some sort of pattern. i decided to sew my triangles on but i also ran a double sided tape dispenser along the back to adhere my fabric to the ribbon so i eliminated to use for pins in my ribbon. less hole marks.
sew your fabric to the ribbon. you have made the bunting! now attach the bunting to the netting. i have to confess something here - i wish i had some amazing method to tell you about how to attach this and you all could sit back in awe. but that is not going to happen. i ended up taking it with thread every three triangles but then by 2/3 way through i got so frustrated that i ran the tape along the back and pressed it on. i know i know - not what you want to here but that's how i ended up doing it.
the tie the backs together to give it a nice finish.
now on to the stars.....
to give it just one more touch i went ahead and made some stars so aydan could lay in bed at night and gaze at the stars.

these were super simple.
lay two pieces of yellow felt together, trace out a star on one side and cut out the stars - both pieces at once. if you use a black sharpie cut just inside your marker and you will see it...as i found out!
next cut som ribbon the length that you want them to hang. dot a little glob of hot glue at the op inside of your star, press your ribbon into it and press your two sides together.
now you can do one of two things. you can glue your edges together or you can sew them. i sewed and i stuffed. you do not have to stuff if you don't want to. just run your stitch around et voila! if you do decided to stuff - run your stitch from side of the outside bottom to the other. {you are reversing and securing your stitch everytime you go on and off right?} now stuff in your stuffing. once you have enough in there pin the bottom closed and stitch up the rest. using your fingers smoosh around the stuffing so it get's to all corners of your star. run some white glue around the outside edge and coat with glitter. let dry. attach safety pins to the top of your ribbons, pin to the underside of your canopy. lay down, admire your work and gaze at the stars.

**my next plan for this is to wrap a string of clear small twinkle lights on white string - when it's FINALLY unpacked at the stores...i have already been to three stores looking and my unpatientness is showing - around the hoop on the inside so at night it REALLY is like gazing at the stars. just remember: do not leave them on unsupervised....but i didn't need to tell YOU guys that, did i?

2 comments:
As Caroline said - you are wonderful! Love this!
So sweet. I love the stars!
Post a Comment